A 10-day microgreens unit works well in a classroom because radish and sunflower microgreens are usually ready to harvest in 8–12 days and 9–10 days, according to Utah State University Extension, so a single school week plus a weekend covers seed to tasting.
Microgreens are one of the few crops that fit a school timetable: there is no multi-month wait, no outdoor bed, and no special climate. Oregon State University Extension has run microgreen units with primary-school classes as part of its Grow This! Oregon Garden Challenge, pairing the planting with a food and nutrition curriculum. This guide lays out a 10-day plan a teacher or after-school club leader can run with a class of 20–30 children, what it costs per class, and what tends to go right or wrong along the way.
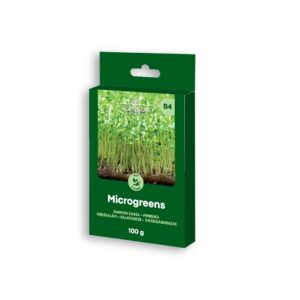
Products mentioned — in stock at IndoorGarden, shipped from Tallinn across the EU.

Why microgreens suit a 10-day classroom unit
A microgreen is harvested within days of germination, usually once the first true leaves appear, rather than weeks or months later like a mature vegetable. That short cycle means a class can plant on a Monday and taste the result the following week, with no growing-over-the-holidays problem and no plant to keep alive all term. Oregon State University Extension’s Woodlawn K-5 project paired seed-starting kits with a nutrition curriculum and had second graders plant, observe and taste what grew — a useful model for a single unit rather than an ongoing garden commitment.
What a class of 20–30 needs, for under €30
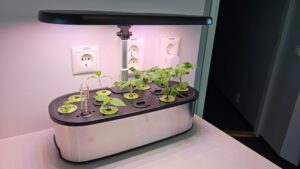
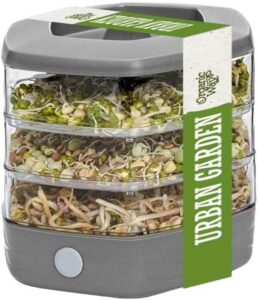
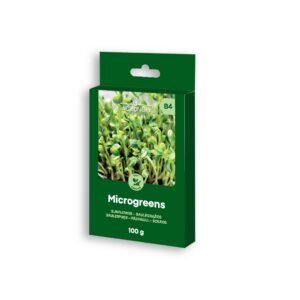
Each sprouting tray or jar can be shared between two or three students, so a class set does not need one container per child. A microgreens sprouter (€11.99) plus a 100 g bag each of radish and sunflower microgreen seeds (€5.99 each) is enough seed for several rounds with a typical class, which keeps the per-class materials cost under €30. Beyond that, the extra materials are ordinary classroom supplies: paper towel or a thin growing medium, a spray bottle, and a sunny windowsill or a basic grow light if the room is dim. Utah State University Extension notes that seedlings need steady airflow and light once they germinate, so a windowsill that gets direct sun for part of the day, or a small grow light on a timer, works better than a shaded corner.
Day by day: from seed to first tasting
Timelines vary by variety and by room temperature, so treat the table below as a planning guide rather than a guarantee for every classroom. It follows the ranges Utah State University Extension publishes for radish and sunflower, the two varieties most schools start with because they germinate quickly and are easy for small hands to sow.
| Day | What happens | What students can check |
|---|---|---|
| Day 0 | Sow radish and sunflower seeds on a moist growing medium; sunflower seed benefits from soaking about 12 hours first, per USU Extension | Count seeds sown per tray |
| Day 1–2 | Radish typically germinates first | First sprouts visible — record the date |
| Day 3–4 | Sunflower shoots catch up; move trays into light once shoots appear | Measure shoot height in mm |
| Day 6–8 | True leaves begin to appear on radish | Compare radish and sunflower growth rates |
| Day 8–10 | Radish (8–12 days) and sunflower (9–10 days) reach harvest size, per USU Extension’s published ranges | Harvest, rinse, and taste |
Those ranges assume a reasonably warm room and daily light; a cold windowsill in winter will run slower, so building in a buffer day or two before the planned tasting session is worth doing.
What students can measure and record
A microgreens unit lends itself to simple, numerical observation rather than abstract description, which is part of why extension services use it with young children. A class can log, per tray: the date seeds were sown, the date of first visible sprout, shoot height in millimetres every day or two, and which variety reached harvest size first. Comparing radish against sunflower in neighbouring trays gives a built-in experiment with no extra setup, since the two varieties grow at different speeds for reasons students can discuss — seed size, the need to soak sunflower seed first, and germination temperature.
Food safety and classroom routine
Because microgreens are eaten raw, soon after sowing, basic hygiene matters more than it would for a plant nobody eats. Clean hands and clean containers before sowing, rinse the harvest before tasting, and avoid letting trays sit in standing water, which favours mould rather than roots. Oregon State University Extension sent a food-safety tip sheet home alongside seed kits in its own classroom project, which is a reasonable model: treat the harvest like any other fresh food served to children, and skip tasting a tray that looks mouldy or smells off rather than persisting with it.
What to expect — and what can go wrong
Not every tray reaches the planned harvest date on schedule. In Oregon State University Extension’s own classroom project, the microgreens “didn’t grow as well as hoped” in time for the planned tasting day, and the educator running it described gardening as “a fun experiment” that does not always go to plan. Building a few spare days into the schedule, and treating a slow or patchy tray as a teaching moment about what plants need rather than a failure, keeps the unit useful even when growth is uneven. Sending a small seed kit home, as that project did, lets a student retry a tray that did not work out at school.
Where to start
For a first run, one microgreens sprouter and a bag of radish or sunflower seed is enough to pilot the unit with a single class before scaling up to a full set of trays. Schools, kindergartens and after-school clubs ordering for several classrooms can contact IndoorGarden about quantities and invoicing, and the wider microgreen seed range covers other quick-growing varieties once radish and sunflower are familiar. For a soil-free alternative that uses only paper towel, see our guide to growing microgreens without soil.
Frequently asked questions
How many days does a microgreens classroom unit actually need?
Plan for 8–12 days from sowing to harvest for radish and about 9–10 days for sunflower, based on Utah State University Extension’s published ranges, plus a buffer day or two if the classroom is cool or light is limited.
Which microgreens are easiest for young children to sow?
Radish and sunflower are common starting varieties because the seeds are large enough for small hands to handle and both germinate quickly; sunflower seed does best with a soak of around 12 hours before sowing, per USU Extension.
Do microgreens need soil in the classroom?
No. A shallow sprouting tray with a thin growing medium, a hydroponic mat, or damp paper towel all work; our soil-free microgreens guide covers the paper-towel method in detail.
How much light do classroom microgreens need?
A windowsill with several hours of direct sun a day is usually enough once the shoots are up; in a dim room, a basic grow light on a timer is a reliable backup, which matters especially in winter when daylight hours are short.
What if the trays do not grow evenly?
Uneven growth is common and was reported even in Oregon State University Extension’s own classroom project. Treat a slow tray as something to observe and discuss rather than a failed lesson, and keep a spare seed packet on hand for a second attempt.
Is tasting the harvest in class safe?
Rinse the harvest before tasting, use clean hands and containers throughout, and skip any tray that looks mouldy or has sat in standing water. Treat it like any other fresh food served to a group of children.