The Kratky method is a passive hydroponic technique that grows plants in a sealed container of nutrient solution without pumps, electricity, or daily refills. You suspend a net cup with your seedling so its roots just touch the water, then walk away. As the plant drinks, the water level drops and an air gap forms above it, giving the lower roots oxygen and the upper roots water. That is the entire system. I have built dozens of these on my kitchen windowsill, and in this guide I will show you how to put one together in about 30 minutes using a mason jar, a 5 cm (2-inch) net cup, and a small bottle of hydroponic nutrient mix.
Why the Kratky method is the cheapest functional hydroponic system you can build
Most hydroponic setups need an air pump, a water pump, tubing, a timer, and a power outlet. The Kratky method needs none of that. It was formalized in 2009 by Dr. B.A. Kratky at the University of Hawaii as a non-circulating method for commercial lettuce production, and it works just as well at home in a single jar. A complete jar build costs about €5 to €10, runs on zero electricity, and produces a full head of lettuce or a thick basil bush in four to six weeks. If you have never tried hydroponics and want to find out whether it suits you before investing in a smart garden, the Kratky jar is the lowest-risk way to test the waters.
How the Kratky method actually works
When I first heard “passive hydroponics,” I assumed the plant would drown or starve. It does neither. The trick is the changing water level. At planting, the nutrient solution covers the bottom of the net cup so the seedling roots can drink. As the plant transpires, the solution drops a centimetre at a time. The roots that started underwater now hang in humid air and become “air roots” optimized for oxygen uptake, while the roots at the bottom keep pulling up water and nutrients. By harvest, the jar is mostly empty and the plant has filled the headspace with a healthy two-layer root system. For more background on the broader principle, see our explainer on what hydroponics is.
What you need: the 30-minute materials list
Here is everything required for one jar. I keep these in a shoebox by the window so I can start a new jar any time.
| Item | Specification | Approx. cost | Where I get it |
|---|---|---|---|
| Mason jar | 500 ml to 1 L, wide mouth, opaque or wrapped | €1–€3 | Grocery store, jam jar reuse |
| Net cup | 5 cm (2 inch) diameter, slotted plastic | €0.30 each | Hydroponic supplier |
| Growing medium | Rockwool cube or coco coir plug | €0.20 each | Garden centre |
| Hydroponic nutrients | Two-part A+B liquid, leafy green formula | €8–€15 (lasts months) | Hydroponic supplier |
| Seeds | Lettuce, basil, or other leafy herb | €2–€4 per pack | IndoorGarden seed range |
| pH test strips | Range 4.0–7.0 | €5 | Aquarium or garden shop |
| Aluminium foil or paint | To block light from the jar | Pennies | Kitchen drawer |
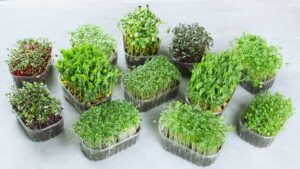
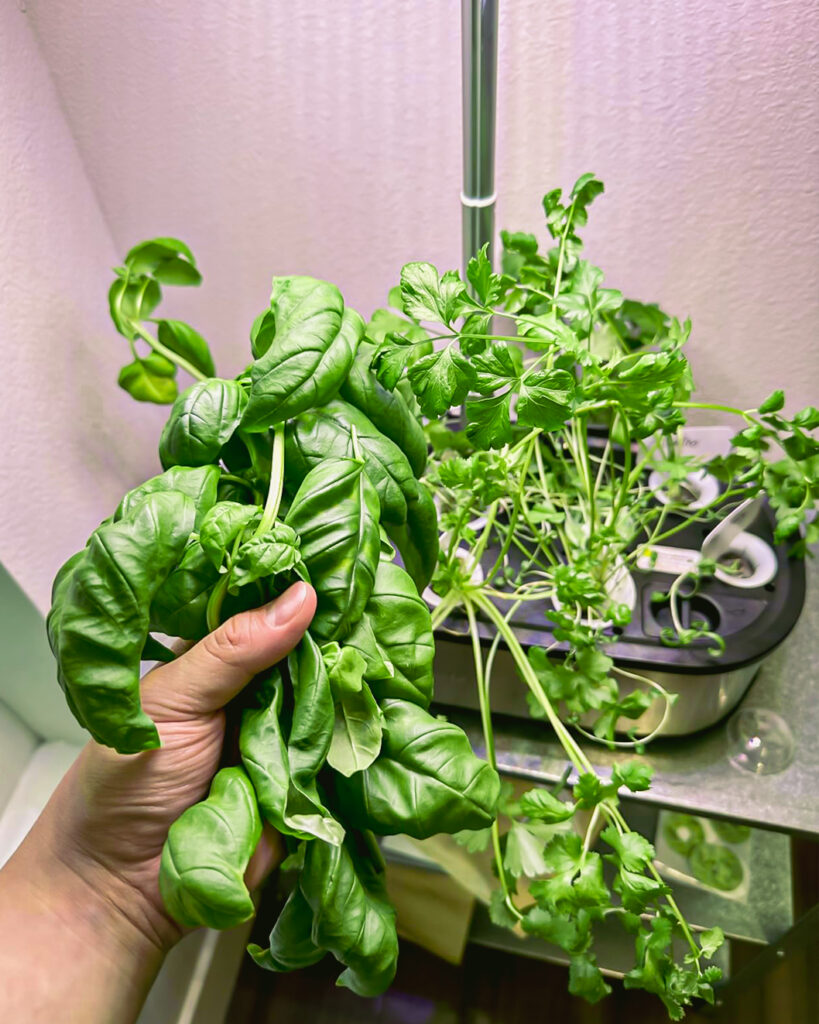
I usually start with lettuce seeds because they germinate in three days and forgive almost any mistake. Basil seeds are my second pick: slower to start but you get a steady cut-and-come-again harvest for months. You can browse the full seeds for indoor garden and hydroponics range to see what suits a small jar.
Step-by-step build instructions
1. Prepare the jar (5 minutes)
Wash the jar with hot soapy water and rinse thoroughly — leftover sugars from jam are an open invitation to algae. Algae need light to grow, so the next step is to block all light from the nutrient solution. I wrap the outside of the jar in two layers of aluminium foil, taped at the seam, leaving the lid area uncovered for now. Painting works too: a coat of black acrylic followed by a coat of white reflects heat in summer. Whatever you choose, the rule is simple — if light cannot reach the water, algae cannot bloom.
2. Cut the lid to fit the net cup (5 minutes)
Take the metal lid insert (the flat disc), trace the outer rim of the net cup onto it with a marker, and cut the circle out with tin snips or strong scissors. The net cup should drop in and rest on its lip with no wobble. If you do not want to cut metal, swap the lid for a piece of stiff plastic from a takeaway container — same trick, easier hands.
3. Start the seed in rockwool (5 minutes plus germination)
Soak a rockwool cube in plain pH-adjusted water (pH 5.5 to 6.5) for an hour, squeeze gently, and tuck two seeds into the divot on top. Cover with a plastic dome or another jar to keep humidity high. Lettuce germinates in 2 to 4 days, basil in 5 to 8. Once the first true leaves appear, thin to the strongest single seedling — two plants in one Kratky jar will starve each other.
4. Mix the nutrient solution (10 minutes)
Fill the jar to the brim with room-temperature tap water that has sat uncovered overnight (lets chlorine evaporate). Add part A and part B of your hydroponic nutrient at the dilution your bottle recommends for seedlings — usually around half the full-strength rate, which for most leafy-green formulas works out to an EC of about 1.0 to 1.2 mS/cm. Stir well between A and B; never mix them together undiluted or they precipitate. Check the pH with a strip and adjust to between 5.5 and 6.5 with a drop of citric acid (down) or baking soda solution (up). If electrical conductivity is new vocabulary, our guide on what EC is in hydroponics and how much nutrient solution to add walks through the numbers.
5. Assemble and place the jar (5 minutes)
Drop the net cup with the seedling-in-rockwool into the hole in the lid. The bottom of the rockwool cube should sit in the water by about 1 cm — that is critical. Roots cannot climb upward, so they need direct contact with the solution at the start. Screw the lid on, set the jar on a bright windowsill (south-facing in Europe gives the best winter results) or under a small grow light, and you are done. From now on, do nothing. Do not top up the water mid-cycle — that is the most common beginner mistake, because adding water re-submerges the air roots and rots them.
What to expect, week by week
For a head of lettuce, my typical jar timeline looks like this: by week one the root tips reach the water and the first new leaves form. By week two the water has dropped 1 to 2 cm and white air roots branch into the gap. By week four the jar is half empty, the canopy fills the lid, and lower leaves are big enough to taste-test. By week five or six the leaves overflow the jar and I cut the whole head at the base. Basil follows the same pattern but takes about eight weeks before the first heavy harvest; after that you can keep snipping for another month. The University of Minnesota Extension’s small-scale hydroponics guide gives detailed yield expectations for home Kratky setups if you want to dig deeper.
Common mistakes and how I avoid them
The four problems I see most often are: forgetting to block light (green sludge by week two), starting with the rockwool above the water (seedling never establishes), refilling the jar mid-cycle (rotten roots), and skipping pH adjustment (nutrient lockout, yellow leaves). All four are five-minute fixes if you catch them early. The jar is forgiving but not magic — get the first 24 hours right and the rest of the cycle runs itself.
Frequently asked questions
Do I need an air pump for the Kratky method?
No. The whole point of the Kratky method is that the dropping water level creates an air gap, and the roots in that gap absorb oxygen directly. An air pump would defeat the design and re-oxygenate water that does not need it. If you want a system with an air pump, you are looking at deep water culture (DWC), which is a different setup.
Can I grow tomatoes or chillies in a Kratky jar?
Not in a small jar. Fruiting plants drink far more water than a 1 L jar can hold and will run dry before fruit sets. People do grow tomatoes Kratky-style, but in 20-litre buckets, not jars. Stick to leafy greens and herbs in a jar — lettuce, basil, parsley, dill, cress, spinach all work beautifully.
How often do I add fertilizer?
You don’t. You mix the full nutrient charge at the start, and that single batch carries the plant from seedling to harvest. This “set and forget” property is what makes the method genuinely passive. Once the jar is empty and the plant is harvested, you start over with a fresh jar.
Why are my roots brown and slimy?
Brown slimy roots almost always mean the solution got too warm (above 24 °C) and grew bacteria, or that light reached the water and triggered algae and pathogens. Wrap the jar more thoroughly, move it away from direct hot sun, and consider switching to a larger jar so the solution buffers temperature swings better.
Is the Kratky method as productive as a smart garden?
Per plant, yields are very close. A Kratky lettuce reaches the same size as a smart-garden lettuce in roughly the same time, because both supply water, nutrients, and oxygen on demand. The difference is convenience: a smart garden waters, fertilizes, and lights multiple plants automatically, while each Kratky jar holds one plant and demands a small ritual at the start and end of every cycle. The jar is the entry point; the smart garden is the upgrade.
My takeaway after building dozens of these
The Kratky jar is the experiment I recommend to every friend who asks about hydroponics. It costs almost nothing, it teaches you everything that matters — pH, EC, root oxygenation, light management — and it produces a real meal at the end. After your first successful jar of lettuce, you will understand why people scale up to multi-plant systems. And if it turns out hydroponics is not for you, you have lost €10 and gained a salad. That is a deal worth taking.